Showing posts with label British. Show all posts

Thursday, February 26, 2015

Rhubarb & Ginger Cake


The vegetable that everyone loves to use as a fruit, rhubarb is simply wonderful. Special whenever it's about it's a real treasure now during this bleak end of February. Deep into the 'hungry gap' - named for the lack of fresh new produce yet to mature whilst the last of the winter crops and storage of root veg and brassica's is running out - the prospect of another week of turnip mash or leek soup, boiled carrots and roasted beetroots to finish the month is less than delightful. I love these veg - along with parsnips and swede, celeriac and cabbage, mushrooms and kale - but it's been the backbone of the veg bag for months. Into the midst of the gloom early forced rhubarb appears at the market, the slender pink stalks a harbinger of spring and the very definition of joy.

Rhubarb grew first in Asia, the cold climes of Mongolia and Siberia were ideal. It was traded along the Silk Road into China and was taken into Italy sometime around the 16th century, from where it arrived in England in the early 1600's. Initially it was mostly medicinal - some strains are useful in the treatment of lung and liver ailments but it seems the wrong strain was introduced to England so cultivation as a source of drugs failed to thrive. Then in 1817 there happened one of those freak accidents that changed the fortunes of rhubarb completely. A gardener at Chelsea Physic Garden unwittingly covered the rhubarb in soil during the winter and later, when the dirt was cleared, rather than finding all the plants to be dead there were tender shoots that were far superior in flavour to the outdoor variety. So the idea of 'forcing' was born. Commercial growers in London began deliberately covering the plants with soil or manure in order to produce the blanched stems, some going further by lifting the roots and moving them inside heated sheds to simulate the arrival of spring.

In the 1870's forced rhubarb began to be grown in Yorkshire - the area now so famous for it that in 2010 it was awarded the Protected Designation of Origin by the European Commission. In perhaps the second lucky accident for forcing, the frost pocket holding Leeds, Wakefield and Morley combined with local conditions proved to be ideal. Sheds were specially constructed for the first time, the local heavy clay soil was particularly well suited, cheap coal from the local mines made heating the forcing sheds viable, there was plenty of horse manure and 'shoddy' - a by product of the local wool industry - was a perfect mulch for the young crowns. Warmth and moisture tricked the young plants into thinking it's spring, and so it grew its lovely bright pink stems; apparently you can hear the rhubarb crackle as it grows, something I would love to witness. Picking was done by hand in candlelight, pretty much the method still used today.

So much rhubarb was produced each day and sent to market that the Great Northern Railway Company ran a special train - the Rhubarb Special! It ran nightly from just before Christmas till Easter to transport the crop to London Spitalfields and Covent Garden Markets, at its peak taking 200 tonnes of rhubarb a day. Imagine that.

It's a much smaller industry now but the forced rhubarb grown in Yorkshire is still very special indeed, its elegant sourness a lovely match for the delicate pink of the stalks. The care that goes into its production is well rewarded by showcasing the stalks. Rather than simply stewing them down to make crumble - my favourite way of using the later outdoor varieties - I really wanted to make cake. This recipe comes slightly adapted from Band of Bakers. The rhubarb is a perfect match with stem ginger, for both its sweetness and the tiny prickle of heat.


Rhubarb and Ginger Cake

You really need to use forced rhubarb for this cake, as the outdoor grown stuff would be too bitter

140g unsalted butter
200g soft light brown sugar
200g wholegrain spelt flour
2 teaspoons baking powder
2 eggs, whisked in a small bowl
5 pieces stem ginger in syrup, chopped fine, plus 2 tablespoons of syrup from the jar
Rhubarb stems, bright as you like, cut into 19cm lengths to fit the cake tin
Caster sugar for dredging

Preheat the oven to 180 C/350 F/gas 4. Grease and line a 20cm square cake tin, I used a loose bottomed one for ease of turning out.

Melt the butter in a large saucepan over a medium heat, then stir in the brown sugar till fully combined, this takes a few minutes until the sugar melts properly into the hot butter. Leave to cool for a few minutes.

Sift the flour and baking powder together and stir into the butter and sugar mixture, along with the eggs and chopped ginger, until well combined. Scrape the batter into the prepared cake tin and level it off with the edge of spatula.

Lay the rhubarb stems onto the top of the cake - try to squeeze in as many as possible as they shrink a bit during baking. Bake in the centre of the oven for around 45 minutes until the cake has risen and a skewer inserted into the middle of the cake comes out clean.

As soon as the cake comes out of the oven brush the top with generous amounts of ginger syrup from the stem ginger jar and dredge with caster sugar. Leave the cake to cool in the tin for about 20 minutes then turn it out onto a wire rack, rhubarb side up.

Serve warm with thick cream or ice cream as a dessert or else cold, sliced generously for afternoon tea.

Guaranteed to brighten your week.


Monday, July 07, 2014

Fish Fingers


Press play for a quick demo

I have loved fish fingers ever since I was a kid, my mum always had a packet or five in the freezer for a quick and easy tea - fish fingers, mountain of mash and lots of peas (also from the freezer). Squish the lot onto a fork for a seriously great mouthful. Sometimes mum would add lemon juice to the mash - a great trick for accompaniments to fishy dishes - but that was pretty much the only fussing about that happened. Then about the time I was around ten or eleven there was a few weeks until we moved from the way out west town of Bourke back to the balmy seaside of Wollongong and so there was a mission to empty the freezer and pantry and eat the lot before leaving. I have no recollection of anything else we ate in those few weeks but I swear we ate fish fingers daily for a month. Sometimes for lunch, more often for dinner it was fish fingers, mash and peas. Fish fingers, lemon mash and peas once or twice then back to the original. The freezer had turned into the black hole of the kitchen and it was somehow filled with one hundred times its actual volume with fish fingers and peas - and we were not leaving till every single finger and every single pea had been consumed. Somehow we made it through, boarded our flights out and left that house behind along with Cliffy our lovely galah, over which many tears were shed. My dad followed us a week later, driving the car back across the 500 miles and, softy that he can be, brought Cliffy along for company. Jubilation!

It was a very long time till I ate another fish finger, about the time I left home and had to fend for myself while a student. I soon revisited the comforting charms of fish fingers, mash and peas - great food ready in no time. It soon became apparent that fish fingers alone was even quicker, or else stuffed into a sandwich the melted butter adding extra delight, and far less washing up overall.

The last packet I bought, a few years ago, weren't great. More crumb than fish, and fish that had an awful lot of reforming inflicted upon it. I gave them up for a while then recently wanted them again. Went to Borough Friday and told Paul, who runs Sussex Fish, that I was planning to make fish fingers for dinner. Good on you madam, he said, had some a couple of weeks ago myself and it was brilliant. He picked up a lovely piece of cod fillet I'll give you that thick section there, be easy to cut that into nice fat fingers. And so it was.

Fish Fingers

400g piece of cod fillet, check there's no bones at all
2 tablespoons plain flour, seasoned with a bit of salt
1 egg, beaten
About 50g breadcrumbs, Panko work well
Oil for shallow frying

Cut the fish into 4 even pieces -these are your fingers. Dip each one first into the flour, coat it well and shake off any excess. Next dip the finger into the beaten egg and coat well. Finally dredge the fish through the breadcrumbs so that it's covered on all sides. Put each completed fish finger onto a clean plate, and when they're all done cover with cling film and refrigerate for 20 minutes or so.

Heat the oil in a heavy based pan over a medium flame, when it's hot add the fish fingers and fry for a few minutes till the underside is golden. Flip them over carefully and fry the other side till they are crisp all over.

You can serve with mash and peas but, making the most of it being summer I tossed a green salad  and added a spritz of fresh lemon. Big hunk of bread in case sandwiches were needed...


Even better than I remember!

Thursday, February 13, 2014

Soda Bread


I made a loaf of soda bread last week, a little uncertain to start with but thrilled to bits with it by the end. I buy a loaf occasionally from Elliots at Borough, but they only make it Saturdays. I have been known to decide I need it beyond all others and set off early with no other thing on the list and return home 90 minutes later, triumphant. Turns out I could have made my own, not just cheaper but faster. It's the faster bit that sticks in my craw. What cheers me up is that it is as good as the one I buy.

Inspiraton for it came from the perfect series in the Guardian, it did indeed sound simple and I needed a little something to go with big bowls of leek and potato soup. The simplicity comes from using  bicarbonate of soda as the raising agent rather than yeast and then having no need to knead or prove. Mix a few bits together, whap it on a baking tray in a vague bread shape, oven for 50 minutes - and you have a proper, picture book style loaf. Apart from yoghurt or buttermilk I had all the ingredients - and they sell yoghurt at the Londis on the corner. In fact they sell pretty much everything in some form or other at the Londis on the corner, though if I go in to buy beer in the evening and the man has been in ahead of me to buy beer then they refuse to let me make my purchase. Delights me every time.

 
Soda Bread

Don't be tempted to omit the treacle, it adds a complex depth of flavour rather than sweetness

450g coarse wholemeal flour
50g rolled oats
1 teaspoon salt
1 level teaspoon bicarbonate of soda
1 tablespoon treacle 
1 tablespoon honey
200g tub of whole milk yoghurt made up to 450ml with milk - or 450ml buttermilk
1 tablespoon melted butter, to finish

Preheat the oven to 200C/400F/gas 6 and grease a baking sheet.

Put all the dry ingredients into a large mixing bowl and whisk together to combine. Stir the treacle and honey - they might need warming slightly to make them runny - into the yoghurt or buttermilk and mix well until combined.

Make a well in the middle of the dry ingredients and pour in the yoghurt liquid. Use your hands to very quickly combine everything and you have a soft sticky dough. Plop it onto the baking sheet and pat it into a round shape then cut a deep cross into the top of the dough. Bake for 50 minutes to an hour, keeping an eye on it, until the crust is golden and the loaf sounds hollow when tapped underneath.

Brush with the melted butter to ensure the bread remains moist and doesn't form too hard a crust. Allow to cool before slicing.

I had thought it would only be good fresh on the day but it made great toast for the next couple of days for  breakfast spread liberally with lots of butter and marmalade and a perfect base tucked under a supper of smoked salmon and scrambled eggs.


Wednesday, January 29, 2014

Leek & Potato Soup


The mission of late has been clearing the freezer, which is harder than it should be. I am a great one for putting something in without having an actual plan for taking it out again and so most things never again see the light of day. I confess my starting point every week for menu plan is definitely more oooh, I know what I fancy  and I go from there, seldom thinking hmm, I have x or y so I shall make this or that and it will be lovely. I don't lack the skill so much as the inclination.

I've done okay with it, using some of the big and obvious things and then found a couple of chicken carcasses that I froze for stock which never happened.  So I dragged them all out, tossed them in a pot with the usual aromatic suspects and simmered me up a fine pot of flavoured broth. Thoroughly brilliant to this point, I feel. Trouble is I had no immediate use for three and a half litres of chicken stock Decanted to clean milk cartons it simply used more space than the original bones. Hmmm.

Ooooh, I thought, winter cries out for soup and good soup needs good stock so I shall simply perform a little alchemy and make me some soup. Even had some (frozen) cream that needed using. I quite fancied something simple and soothing, using winter veg. I toyed with the idea of broccoli but went off it before I got any further and regretfully rejected cauliflower because I'd had a couple of cauliflower things recently. Had almost decided on curried parsnip when I read about leeks and their lush versatility. Decided on leek and potato soup, something I've not made for years.

Step one, I confess, was putting a couple of litres of stock in the freezer, but with luck it will be risotto or similar within the month. Step two was to take myself off to Brixton Market for some lovely fat leeks and a few potatoes. When I've made it previously I always stir chopped veg through a little melted butter then add stock and simmer for an hour or so till everything is softly approaching mush then blend it till smoothish and add cream or cheese. I like it for its almost generic gentleness but I must confess I'd be hard pressed, if blindfolded, to identify the actual soup. Which is a shame given leeks ability to add a complexity of flavour to the soothing blanket that is pureed potato. Thinking it through I decided it was probably the lengthy simmer that was doing me no favours.

I started at the same point as always, melting butter and coating roughly chopped potato and leek but, instead of adding the stock and leaving it I turned the heat low and covered the veg with a circle of greaseproof paper before putting on the lid. The vegetables steamed gently for about 15 minutes till they'd softened but, crucially, still retained all their lovely flavour. Once the stock was added and simmering it was only five minutes or so to finish the cooking. Quick blitz, stirred in the cream and soup was done, a gorgeous textured liquid tasting wonderfully of leeks. Not just faster, better!

Leek & Potato Soup

I confess this makes a lot of soup, but it freezes well! And indeed that's where some of mine ended up...

50g butter
3 garlic cloves, peeled and roughly chopped
7 or 8 large leeks - about 2cm in diameter - washed and cut into 1 cm rings, both white and green
1kg floury potatoes, washed but no need to peel, diced into 1cm cubes
1.5 litres of chicken or vegetable stock
Salt and pepper
About a quarter of a nutmeg, finely grated
250ml cream
1 egg per serving - optional

Melt the butter in a large pan and add the garlic, leeks and potato. Stir to coat well then cover the vegetables with a circle of greaseproof paper then put the lid on the pan and turn the heat to very low.  Leave the vegetables to simmer for about 15 minutes until just tender. Discard the paper and add the stock, increasing the heat to medium. When it comes to the boil, season and then turn the heat down and simmer for five minutes. Take the soup off the heat and puree either with an immersion stick or blender till smooth. Add the grated nutmeg and cream and stir through till well combined.


At the Canton the other night I noticed they had leek and potato soup on the menu, with a poached duck egg added. Could not resist trying that. The yolk added a golden richness to the soup, quite a delight on a cold winter night.

Tuesday, May 12, 2009

Rhubarb Struesel Cakes


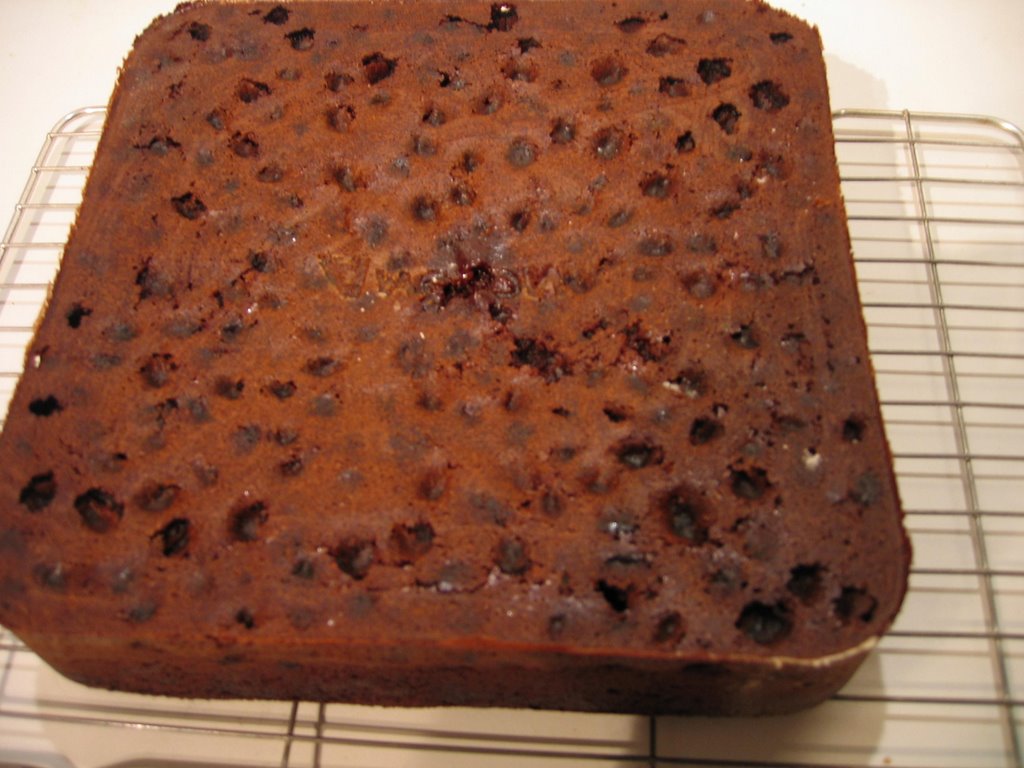
Oh dear. I have sometimes wondered if you really do need to have special baking tins for muffins or cupcakes. Surely if you just buy a pack of those sweet little pleated cases and put them onto a flat baking tray and fill them with the required mix you'd get the same result? As the photo above attests the answer to that question is a resounding NO. Sadly.

I don't do a lot of sweet cooking but occasionally will come across something that sounds interesting/fabulous/perfect for some specific occasion. Hence the non ownership of muffin tin. One of last week's hot links in my Gourmet email was for these little rhubarb cakes and I was taken with them partly because I love rhubarb and partly because it didn't require the rhubarb to be cooked prior to baking - just chop finely and douse in icing sugar. Liked the sound of it - and here was the perfect moment to test my cupcake theory.

If I'm honest I knew before they even went into the oven this was heading for disaster. As I put the first lot of batter into the base of the little cases they kind of flattened outwards, but not too badly so I perservered. Sprinkled my little flecks of rhubarb on top then finished with dark sugar butter and put them in to cook.

Twenty five minutes later they came out of the oven looking like pull-apart buns with little pleated frills making patterns across the tray. So thoroughly wrong I had to laugh. Pull them apart I did, however and fortunately they taste great, not too sweet and lovely spice finish on top.

Rhubarb Streusel Cakes
Makes12 individual(!) cakes

For topping
3/4 cup all-purpose flour
2/3 cup packed brown sugar
1/2 teaspoon cinnamon
1/8 teaspoon salt
70g unsalted butter, softened
200g fresh rhubarb stalks, cut into 1/2 cm dice
3 tablespoons icing sugar

For cake batter
175g plain flour
1 teaspoon baking powder
1 teaspoon salt
115g unsalted butter, softened
3/4 cup granulated sugar
2 large eggs
1/2 teaspoon vanilla
1/2 cup whole milk


Special equipment:
a nonstick muffin pan with 12 (1/2-cup) muffin cups


Preheat oven to Gas4/ 375°F. Generously butter muffin cups and top of pan.

Make streusel for topping:
Whisk together flour, brown sugar, cinnamon, and salt in a bowl. Blend in butter with your fingertips until mixture forms small clumps.

Make batter:
Stir together flour, baking powder, and salt in a bowl.


Beat together butter and sugar in a large bowl with an electric mixer at medium speed until blended, about 2 minutes. Add eggs and vanilla and beat until fluffy, about 1 minute.

Reduce speed to low and add flour mixture and milk alternately in 2 batches, beginning and ending with flour mixture and mixing until just combined.

Top and bake cakes:
Divide batter among muffin cups (each cup will be about half full). Toss rhubarb with icing sugar and sprinkle batter with rhubarb, then crumble streusel evenly on top.


Bake in middle of oven until tops are golden and a tester inserted in center of a cake comes out clean, 22 to 25 minutes.

Cool cakes in pan on a rack 3 minutes, then loosen edges of cakes with a small sharp knife or small metal spatula. Remove cakes from pan and put on rack to cool slightly.

Next time I might just make it in a pan - dispense with the cases altogether!


Ham hock peas and leeks


Had to make this thoroughly lush dish because the title made me laugh.

I am still on a ham hock mission and the one that's been in the freezer for a couple of weeks has had me wondering about many possible incarnations. Then I found this recipe on the Daylesford's site and was instantly smitten. It sounded simple and tasty and definitely in season - and it was vastly better than I was expecting. The stock gives it a lovely depth and the combination of cream and butter makes it really decadently silky and rich. Soft ribbons of leeks mix with the sweet crunch of peas and the clean taste of fresh parsley. Quite wonderful, especially for a Monday night.

The Passionate Cook is hosting the current 'Waiter there's something in my...' event - which is a fun way of having random bloggers give their own interpretation of a theme. I have read them occasionally and sometimes been tempted to submit a post but this is the first time I've felt it all fitted together for me. It is based aroung bistro food and it strikes me that this dish would be a delightful thing to find on such a menu. If bistro food is about simply prepared, simple to serve, tasty to eat and preferably goes well with lots of bread to mop juices then it ticks every box. Both slow food and quick, you cook the hock well in advance, then when time comes for eating it's ready in fifteen minutes.

I started Saturday as I pottered about doing those damned domestic drudgeries...

Simmer the hock in water with a few aromatics for a couple of hours while you get on with doing other things then let the hock cool in the stock. Strip the meat from the bone in largish pieces and keep the skin separately. Strain and boil the stock to reduce it by half. Put the cooled stock and the meat into the fridge till you're ready to use them. Divide the skin into two and freeze separately for adding, finely chopped, to add lushness to lentils for another meal. All this takes ten minutes of active time so hardly even rates as a distraction.

Ham hock peas and leeks
1 ham hock, cooked as above
4 leeks
25ml olive oil
50g unsalted butter
75ml cream
200g shelled peas - I used frozen
30g flat-leaved parsley

Pour olive oil into a large sauté pan and toss the leeks gently over a medium heat until well coated with oil, season with salt and pepper, add butter and cook slowly for about ten minutes.

Add 100ml of reserved ham stock and cream to the leeks, reduce by half, then add the peas and simmer for approximately 3 minutes then add the pieces of hock. Simmer for another minute or two until the ham is warmed through and the peas are just cooked. Stir through the parsley.

Serve in a warm bowl with lots of fresh crusty bread - I bought a white loaf from St John which is some of the nicest bread made.

A most perfect meal.

Monday, April 06, 2009

Slow Roasted Ham Hock


I am currently enamoured of, amongst other things, ham hocks. Look at that photo and it's not hard to see why. They are lovely juicy things, full of flavour and very cheap. They give abundantly to the home cook without a lot of effort, requiring generally only that you give them time to cook.
.
Simmered with herbs and a few vegetables they provide moist meat and a pot of stock for soups or risotto and this is the way I normally cook one. But I read somewhere of Mario Batali, the New York chef and writer, serving up slow roasted hock and I have had a hankering for that ever since. In my mind's eye it was crispy and sticky and juicy - surely a simple enough thing to produce?

So this Saturday I bought not one but two hocks from Silfield Farm shop, the idea being to have one with garlic potatoes and a poached egg for a fairly decadent Sunday night supper and then have the other cold in lunchboxes for a couple of days with some crispy salad. But then I bottled it.
.
I'd made a fairly ordinary stir fry with mussels and clams Saturday night that should have been fabulous and suddenly I was worried that I was going off half cocked again and would end up having another ordinary dinner and daily reminders of the disapppointment till the second one was finished. The second hock went into the freezer.
.
Shouldn't have worried - it worked brilliantly. The thyme and onions gradually melted into an unctuous mess in the base of the pan, the cider gave the meat a nice stickiness without being particularly sweet and the final blast of heat made the skin golden and crisp.
.
Utterly lovely.

Slow Roasted Ham Hock
1 unsmoked ham hock, about 1kg in weight
3 or 4 onions, peeled and thickly sliced
4 sprigs thyme, leaves shredded off the stalks
1 tbspn olive oil
100ml dry cider
Salt and pepper

Wash the hock. Heat the oven to Gas 2. Put the olive oil into the base of a roasting pan then cover with the sliced onions and thyme leaves. Add some salt and pepper and mix it all together with your hands. You should have a layer of onions about half an inch thick. Put the hock on top and season lightly. Spoon over a little cider then loosely cover the pan with foil.

Put the pan into the oven and cook for about two and a half hours, basting with the cider every half an hour.

Remove the foil and turn the heat up to Gas 7 and cook for another 20-30 minutes till the skin is all golden and crisp.

Rest for 20 minutes then slice and eat with a pile of onions.

Completely amazing. And just enough left for lunch Monday.
Not to mention one that's now in the freezer in need of a plan... Ideas?

Wednesday, February 11, 2009

Creamed Winter Veg

Winter Veg in Cream


Along with the roast pork we had on Sunday I wanted winter veg - it being winter with the weather to match. I had a parsnip in the fridge and I bought carrots and a lovely fat swede. I also bought a tub of cream - it being winter with the weather to match and so a little indulgence is allowed.

The process could not be simpler. Peel and cube each of the vegetables into dice about one centimetre square - half an inch in old money. Cook each one separately in boiling salted water till just al dente. This doesn't need to create vast amounts of washing up - do them one after the other in the same pan, preferably one that is big enough to hold all the vegetables together. When all are just cooked and drained warm a small tub of cream with a sprig of thyme and a single clove of peeled garlic - in the same pan - till the cream comes to a simmer. Take off the heat and leave to steep for ten minutes.

Remove the garlic and thyme, add the vegetables to the cream and gently warm through.

Serve.

I think the reason I like this so much is that each vegetable retains its individual flavour and because they are cooked in water they are very light, almost delicate. The cream wraps around them rather than soaking in - just lovely. Interestingly they are really nice cold next day in lunchboxes.

Seriously recommend.

Total cost about £3 - good cream ain't cheap.

Monday, February 09, 2009

Slow Cooked Pork

Just enough pork left for Friday's lunch!

It would be fair to say that this was a bit of a disaster and possibly my fault for believing the recipe when it wasn't right. But in my defence I'd never cooked it before and so I simply didn't know what I was really doing. As the man remarked if you push the envelope all the time with your food you're bound to end up with an occasional paper cut.

I bought a magnificent piece of pork from Charlie at the Ginger Pig - leg on the bone. I requested a piece between 2 1/2 and 3 kilos and he cut me 2.75kg. You just have to admire the skill. I wanted to slow roast it with fennel and chillies from a recipe from The Borough Market Cookbook, specifically the section devoted to the Ginger Pig. You can see why I might have had faith in its provenance. Reading it through I realised there was a bit of a hiccup early on when it was unclear if you cook at a high heat for 30 minutes or an hour but I went with 30 then turned it down to gas 2, which is slow but not ultra slow. There was no liquid to be added at this stage but the instruction was to turn the joint over to fat side down. I left it uncovered a little hesitantly but I have to admit I did turn the dial down to 1 before we went out for a couple of hours - to be on the safe side. Glad I did - would have been a fully fledged disaster if I hadn't.

Got back after the meat had been in for four and a half hours - and blackening all over. Flipped the meat back to right way up and added 500ml of pork cooking juice from a previous meal and covered it with foil. Allegedly it still had an hour or two before 45 minutes at full blast to finish it. I lasted about 45 minutes still at Gas 1, then with the liquid absorbed and the top blackened but definitely crackled I pulled it out and wrapped it in foil.

Considered the idea of dinner at 5 - but too too early for me. The meat stayed reasonably warm and inside the crust was delightfully moist and richly spiced with fennel and garlic and chilli. Scraped all the black bits off the base and mixed it with water to make a very dark and highly spiced sauce with only a slight hint of burnt. Served it with lightly steamed winter veg medley with a cream sauce and crispy roast potatoes for a good dinner. But not the truly great one I'd been hoping for.

The following recipe is what I will do next time...

Slow Cooked Pork
2 1/2 - 3kg piece of leg of pork on the bone, and ask your butcher to score the skin
5 cloves garlic
1 tbspn fennel seeds
1 tspn red chilli fans
1/2 tsp fresh ground black pepper
3 tbspn olive oil
4 tspn sea salt
400ml white wine or pork stock

Unwrap the meat and put it onto a plate, very loosely covered with a piece of greaseproof paper and put it into the fridge. About an hour before you plan to start cooking, take the meat out and bring it up to room temperature.

Heat the oven to 220C/425F/gas 7.

Peel the garlic and put them into a mortar along with the fennel seeds, chilli flakes, pepper and 1 teaspoon of salt. Pound with the pestle to make a rough paste. Rub the paste into the flesh side of the pork, really working it into the meat.

Put the pork into a roasting pan big enough to leave a little space around the edges of the meat. Drizzle the olive oil over the skin and rub the rest of the salt in.

Put the pan into the hot oven for 30 minutes, then turn the heat down to 100C/200F/gas 1/2. After another half an hour drain any fat that has collected in the pan then add the wine/stock and cover the pan tightly with double layer of foil.

Continue to cook for 5 or 6 hours, adding a little more liquid if necessary. Baste occasionally.

When the meat is juicy and pulls apart easily with a fork, remove the foil, increase the heat back to 220C/425F/Gas 7 and put the meat back into the oven. Cook for another half an hour - but keep a close eye on it. You want thoroughly golden crisp crackling but not burnt bits.

Remove the meat from the pan and put it onto a warm plate, cover with foil and allow it to rest for half an hour or so.

Drain the fat from the pan and then deglaze the pan with water, reduce slightly and serve this as a spicy gravy with the meat.

In the end the version we had was really quite nice - certainly once we got past the slightly charred crust. It was very good for lunches and lasted for the whole week - making the £20 the meat cost a not unreasonable price.

Seriously recommend this as a way to cook pork.

Tuesday, February 03, 2009

Sweet Parsnip Cake

Cake!
I have been wondering lately about using vegetables in cakes and sweet things after the success of the beetroot chocolate brownies. Fruit loaf made with parsnips, carrot cake spiced with fennel and cinnamon, afternoon tea with hot golden pumpkin scones dripping butter - that sort of thing. Grated root vegetables subtly alter the character of these fabulous treats without the veg in question – carrots, beets, parsnips, even sweet potatoes and pumpkin – dominating the flavour. It is a cheap and healthy way to bulk out cakes and a simple cheat to get the vegetable averse to unwittingly enjoy consuming a few. Cake that is good for you!
.
I'm not much of a cakey pig myself - an occasional slice is good but I can go for months without and never miss it. The man though has a definite penchant. Snowed in at home on Monday - well there were no buses, how good is our new mayor - so I decided to make cake to fill the flat with warmth and a lovely smell. The recipe I used is similar to one in Hugh F-W's Guardian column a little while back. It's quick and easy and a treat for my sweet.
.
Sweet Parsnip Cake

180g self-raising flour
180g golden caster sugar, plus 1 tbsp extra for dredging
1 tsp baking powder
Finely grated zest of 1 lemon
100g raisins
50g candied peel
3 eggs, lightly beaten
180g butter, melted and left to cool slightly
150g parsnips washed, peeled and grated
.
Preheat the oven to 180C/350F/ gas mark 4.
.
Grease and line a 900g loaf tin.
.
Gently mix the flour, sugar, baking powder, lemon zest and dried fruit. Stir in the eggs and butter, then gently fold in the grated veg.
.
Spoon the mixture into the loaf tin, smooth the top with a spatula and bake for about 55 minutes, until risen and golden, and a skewer comes out clean.
.
Sprinkle a tablespoon of caster sugar over the top. Leave to cool in its tin for 10 minutes, then turn out on to a cooling rack.
.
The sugar on top melts a little in the heat and forms a lovely crispy edging on top of the cake.
.
Make this for less than £2 - and have enough for at least a dozen generous slices to share.

Sunday, January 25, 2009

Ham & Leek Patties

Ham & Leek Patties
.


I bought a ham hock on Saturday from Silfield. I was looking for something cheap and interesting for dinner Saturday. At the bus stop before the market the man suggested ham, egg and chips which sounded a like a bit too much faff so I settled on this idea instead which I think is probably four times as much faff as his suggestion. I never learn.


However just have a look at those little beauties and tell me you wouldn't like one. I'm pleased to say that the end result was decidedly fab. But even I have to admit it took a long time getting there, though mostly not involving large amounts of actual work. It was Saturday after all.


A hock is a bit of a treasure. It is cured along with the hams and bacon and sold separately as they are equal measures of meat, fat, skin and bone. Nature's stock cube. They are cheap - £2.95 for a meaty hock that weighed 1.3kg and they yield an awful lot with not much effort. To start I simply simmered it for a couple of hours with a few aromatics giving me cooked meat, a pile of ham fat and skin, and a litre of well flavoured stock. Already a result.


The stock I froze for risotto along with half the meat. The other half of the meat I roughly shredded for my patties. Earlier in the day I dried out some leftover bread I'd frozen in bits, then blitzed it in the processor for fresh crumbs. I've been hankering for fishcakes lately - for the potato and crumbs fried till crispy as much as anything. Winter comfort.


Using the same kind of principles I use for fishcakes I finally served these up about 8.30 Saturday night. We'd been out to the cinema to see Slumdog - and no I would not recommend it - in the afternoon and got home about 4. Which is when I put the hock on to cook... might have been better if I'd cooked it earlier. Or made the patties next day.


Ham & Leek Patties


About 200g cooked ham, shredded - obviously you could just buy a piece...
About 200g floury potatoes
2 leeks, washed and thinly sliced
1 egg
1/2 tspn fresh grated nutmeg
1 cup fresh breadcrumbs
Salt and pepper
Oil for frying


Peel and cook the potatoes in boiling salted water till just cooked. Drain in a colander then put them back into the saucepan and mash them, without adding any milk or butter. Add the shredded ham, sliced leeks, nutmeg and egg and mix thoroughly so that all the chunky bits are evenly distributed through the potato. Taste a bit and season accordingly.


Put the breadcrumbs onto a flat plate.


Divide the mix into six equal portions and shape into patties. Dunk them into the crumbs to cover them generously all over. Put them onto a plate and refrigerate for at least half an hour so that they will firm up and not fall apart in the hot oil.


Heat half a centimetre of oil in the bottom of a heavy pan till very hot. Add the patties, cover with a lid, and reduce the heat only slightly. After about 5 minutes they should be crispy golden on the underside. Flip them carefully with a spatula and cook, uncovered for another 5-8 minutes till they are gold all over.


Whent they are cooked take them out of the pan and rest on a plate covered with kitchen paper to remove any grease.


Perfect served with beetroot and barley salad for a really good dinner. And very nice cold next day.


Total cost is about £1.50 given what else I can do with the rest of the hock stock and meat. Bargain!


Beetroot and Barley Salad

Beetroot and Barley Salad
.
This is an evolving salad that I am very taken with. It is sumptuously beautiful to look at - grated raw beetroot stains everything a deep crimson red and the walnut oil polishes everything to a glorious shine. It is a good dish for this time of year - the barley makes it chewy and substantial, the occasional nugget of toasted walnut is a treat to come across, the raw beetroot and parsley are clean and earthy with a great depth of flavour in every mouthful. It is also very simple to make. The only thing to be wary of is grating the beetroot - too much enthusiasm and the kitchen looks like the aftermath of a chainsaw massacre. I don't know why it is but as soon as I start grating beetroot it is suddenly all over the place in bright red globules no matter how careful I try to be. And it's a definite bugger to clean up.
Beetroot and Barley Salad
250g barley
1 beetroot about the size of a tennis ball, peeled and grated
100g walnuts, lightly toasted
4 tablespoons of chopped flat leaf parsley
4 tablespoons walnut oil
2 tablespoons olive oil
3 tablespoons sherry vinegar

Cook the barley in boiling salted water till just al dente - about 20 minutes. Drain in a colander and leave to cool.

Tip the barley into a large bowl and add the toasted walnuts, chopped parsley and grated beetroot. Stir in the oils and vinegar and mix thoroughly. Try a mouthful and season accordingly.

And that's it. It will keep happily in the fridge for a couple of days - and is a decidedly cheery sight in lunchboxes. Cheap too - I had everything I needed for this except the parsley but the cost of half a pack of barley and a beetroot and the measures of oils and things would not come to more than £2.


Thursday, January 15, 2009

Leek & Stilton Quiche


Christmas is over, dragged off somewhere into the past and yet, somehow, I still had a small piece of Stilton in the fridge like the remains of christmas past. This time of year I believe stilton to be seasonal - xmas just isn't xmas without a chunk of colsten basset from Neals Yard. There was also though a large hunk of pecorino from Gastronomica and a brique du juissac from Comptoir Gascon. Along with the mass of other food we had I guess it's not entirely surprising there is a little left a couple of weeks afer the event.

I cannot throw it away - no! no! it says to me in it's little stilton voice - even past its best it is far too fabulous for that.
We had dinner with Jaey and Marie recently and we ended with another big block of stilton that they paired with home made chocolate truffles - the match of rich dairy salted and rich dairy sweet was just brilliant. So I wondered about pairing the cheese with the sweetness of winter leeks, which really are in season! - all bound together with eggs and cream in a pastry case to make quiche. Because I am very fond of quiche.

It was a quite splendid result.

Leek & Stilton Quiche

Prepared shortcrust pastry (I had some in the freezer from my last quiche)
About 100g stilton, grated
500g leeks, cut in to 1cm slices
1 large onion, finely diced
Clove of garlic, peeled and finely chopped
Leaves picked from a bushy sprig of thyme
50g butter
1 tablespoon olive oil
4 eggs
284ml tub of double cream
Salt and pepper

In a large pan melt the butter into the olive oil then add the leeks and onions and thyme and garlic. Stir to coat thoroughly with the buttery oil and cook gently for about 20 minutes, stirring occasionally, till all is softly fragrant and melded. Season.
Preheat oven to 200C/400F/Gas 6.

Meanwhile, butter and flour a (loose bottomed if you have one) pie dish about 18cm across. Roll out the pastry to about 5mm thickness and line the pie dish. Cover with greaseproof and fill with baking beans and cook for about 12 minutes. This is baking blind.

Take the case from the oven, remove the paper and beans and allow the shell to cool.

When the leeks are soft turn off the heat and allow to cool a bit till they are warm.

In a bowl beat the eggs and cream and season. Add to the leeks.

Sprinkle the grated cheese over the pastry base then top with the eggs/leeks mixture.

Cook in the preheated oven for 40-50 minutes till the custard is set and the top is richly golden.

Definite result. Nice warm, possibly even better cold next day.

Also very cheap - had the cheese and pastry already so the cost was about £4. To buy the cheese would add about £1.80. Easily serves 6 with bread and salad - or in our case, a coupel of dinners and a couple of lunches, all of them a pleasure.

Monday, January 05, 2009

Beef & Mushroom Cobbler


It is sooooooooooooooooooooooooooooooooooooooo cold.

I realise it's winter and I know that it's not an unexpected event but WOW. Seriously minimal temperatures for ten days now and more set to come. We had a robin bob bob bobbing in the garden christmas day making quite a racket for such a little bird and now we have snow.

Really needed something that was cockle warming Saturday night to get us through the weekend and hopefully banish the last of my flu. Had to be something vaguely traditional rather than spicy for some reason so I settled on stew made special with the addition of cobblers. Before I came to London cobblers was the slightly old fashioned term for a group of shoe repairers. Then I moved here and discovered that cobblers is in fact freighted with meaning. Bit rude, even.

Cobblers is a classic of Cockney rhyming slang. It originates from cobbler's awls, which are the pointed hand-tools that cobblers use to pierce holes in leather. The rhyme is with balls, or testicles (presumably spoken in the broadest of cockney accents). Lots of people use it as a sort of expletive, possibly unaware of where it came from, to such an extent that it is now considered an acceptable vulgarism.

Upon my arrival on these shores another unknown - to me at least - meaning of cobblers is a rough topping for pies, named for the shape of cobble stones rather than balls I suspect... It's lovely stuff, essentially a cheesy herby wet scone dough that puffs gently on top of your stew, adding fragrance and carbs and stretching your meat to feed more. All that could possibly be desired.

Beef & Mushroom Cobbler

500g diced stewing steak
400g onion, roughly chopped
2 tbspns olive oil
500g field mushrooms, sliced thickly
2 tbspns butter
2 sprigs thyme
2 bayleaves
1 tbspn tomato paste
2 tbspn plain flour
500ml stock or water

For the cobblers
Small bunch of chives, thinly sliced
225g self raising flour
1 teaspoon baking powder
85g butter
75g Parmesan freshly grated
225ml full fat mik

Make the cobblers first. Sift the baking powder and flour together in a bowl. Chop the cold butter into the flour and, using your fingertips, rub the butter into the flour until you have what looks like pale yellow breadcrumbs. Stir in the chives and the grated Parmesan along with a good grinding of black pepper. Then gradually add the milk to make a sort of wet scone dough. Don't over mix it. Put the bowl into the fridge till you are ready to use it.


Heat the olive oil in a large pan and cook the meat till it just starts to brown. Remove it from the pan and set it to one side.

Return the pan to the heat and add the chopped onions. Stir frequently and cook over a moderate heat till they just start to caremalise - about 20 minutes.

Add the meat to the onions and then add the tomato paste and flour. Stir for a couple of minutes till the flour is incorporated into the mix then add the herbs and stock. Bring to the boil, then reduce the heat to a simmer and cook gently, with the lid on the pan, for about an hour.

Meanwhile melt the butter in a separate pan and fry the mushrooms. When they give up their moisture keep them on a low heat till most of it evaporates.

Add the cooked mushrooms and their remaining juice to the meat. Season.

Continue to cook over a low heat for half an hour.

Put the meat into a good sized casserole dish and top with spooned lumps of the cobbler mix. Bake at gas4/moderate/250F for 30 minutes till the top is a mass of golden lumps.

Serve with boiled carrots and sprouts.

This will serve four very generously and cost £4.25 for the meat, £1.50 for the mushrooms and less than 50p for the rest of the bits. Saucy!

Monday, October 13, 2008

Scallops with Bacon and Cauliflower Purée


Last week I bought a cauliflower at Booths. I was making a vegetable pulau and it was intended for that. But only half of it. Come the end of the week the other half was still in the fridge and I didn't want to waste it. Though not expensive it still seems wrong to throw it away so I wanted to incorporate it into the weekend menu somewhere. Initially I thought of cauliflower cheese with Sunday roast but then I had a hankering for something a little more exotic, fritters possibly. Spiced.

Then I couldn't think what to have with spicy cauliflower fritters so that plan went by the board as soon as I thought of scallops. I love them with a passion, their sweet dense flesh is always a joy. The man shares my feelings for these creamy little discs fresh from the sea. The two things are a marriage made in heaven. It could perhaps be thought that spending £9.50 on scallops in order not to waste 50p worth of cauliflower was not a well considered plan but I would argue that it was one of my best plans of the month. It was an amazing dish - the purée, made with stock rather than cream, was a wonderfully delicate thing, matched perfectly by the perfectly cooked scallops. And the topping of finely shredded bacon cooked briefly with garlic and parsley rounded out the salty sweet flavours to make a dish that was simple and extraordinary.

Scallops with creamed cauliflower, bacon and garlic
8 medium-large scallops, removed from the shell and cleaned
Salt and freshly ground white pepper
60g streaky bacon cut into very thin strips
80g butter
2 cloves of garlic, crushed
1tbsp chopped parsley

for the cauliflower purée
1 small head of cauliflower or half a medium head
Stock to cover - I used chicken but vegetable would work
A good knob of butter

First make the creamed cauliflower. Chop the cauliflower into small pieces and put them into a saucepan with the butter and just cover with stock. Season with salt and pepper, cover and bring to the boil. Cook for 10 minutes, stirring occasionally then remove the lid and cook on a high heat until almost all the liquid has evaporated. Blend until smooth with a stick blender then re-season. Leave on a very low heat.

Meanwhile gently cook the bacon in about 20g of the butter, add the garlic cloves now and cook for 2-3 minutes without colouring.

While the bacon cooks season the scallops on both sides and heat a pan, preferably non stick, with a little oil until almost smoking. Fry the scallops on a high heat for about a minute on each side.

Add the rest of the butter to the bacon/garlic mix and heat until foaming, then add the parsley and season with salt and pepper.

Put a generous slick of cauliflower onto two plates, top with 4 scallops on each and then spoon the bacon on top.

Magnificent.

This comes from a recipe by Mark Hix published a few years ago in the Independent but accessible with the magic of the internet.

Thursday, October 04, 2007

Roast Beef


At Borough on Saturday I bought a lovely piece of silverside from Lizzie at Wild Beef, with every intention of cooking it for Sunday supper. But I spent Sunday morning cooking lunch for 56 people with Foodchain - a charity I volunteer with - and by Sunday night I was simply too tired to contemplate it. The man made sausage and fried egg sandwiches instead - and most fine they were too.

So last night we had roast beef instead. The idea of a midweek roast may seem a little daunting, or at the least that it will take too long to cook but in fact it is very straightforward with a great end result. That there is only the two of us makes it simpler, perhaps but this could easily be done for four in the same time.

Preaheat the oven to gas 5. In a large roasting pan put a couple of tablespoons of olive oil and then in the centre of the pan put five or six unpeeled cloves of garlic, flattened under the blade of a kitchen knife. Place a piece of roasting beef - topside, top rump, silverside - that is about one kilo (2 pounds) in weight on top of the garlic. Next, peel the outside skin off a couple of large onions - one per person - and put those into the pan next to the meat. Peel three or four red fleshed sweet potatoes (the red are much sweeter than the white), cut them into chunks and scatter them in the available space in the pan. Drizzle a little more oil over the vegetables, then season meat and vegetables with salt and ground black pepper. Put the pan into the centre of the oven.

My cousin and his wife came over Monday night and very generously gave us a big bag of new potatoes that they had harvested from their own garden that very afternoon. They were a perfect accompaniment for beef - I simply rinsed the remaining soil from them and cut them in half then put them into a pan of salted water.

A perfect roast dinner must always have something green - and for our dinner last night the green of choice was brussel sprouts. I peeled the outer leaves from the fat little bulbs, cut a cross in the base - I don't know why but everyone does it - and put them into a separate pan of salted water.

Baste the meat and turn the vegetables every fifteen minutes. After the meat has been cooking for 50 minutes, turn the potatoes on to boil. After the meat has been in the oven for an hour, take it out, put it onto a warmed plate and cover tightly with aluminium foil. Put the roasted vegetables back into the oven and reduce the temperature to gas mark 2.

When the potatoes reach the boil, turn the heat on under the brussel sprouts and reduce the heat under the potatoes till the water simmers rapidly. Do the same for the sprouts when they reach boiling. Allow to cook for 10-15 minutes till tender.

Slice the beef thinly and put on to warmed plates. Add the roasted vegetables, drain the potatoes and serve, then drain the sprouts and add them to the plates. We didn't have gravy - it makes for a lighter meal though the man did add a slick of Polish horseradish.

Voila! - dinner is served. It' s not quick - the whole thing takes about ninety minutes - but there is very little prep involved, and what there is happens in the first five minutes.

Tuesday, February 27, 2007

Pork Rissoles with Apple and Prune


When I decided to make these lovely little meat balls I felt convinced they were quintessentially English food, partly because of the classic combination of pork and apple but also the inclusion of suet. Braised in the oven to make a rich juice that is perfect with mash and steamed cabbage this is a lovely plate of food to serve up on a winter's night. So I expounded my theory about its utter Britishness to my man - who is thoroughly English born and bred - and he looked puzzled. Never had it, never heard of it, but happy to try it was pretty much the summation of his response. So much for my understanding of the locals!

The recipe comes from Gary Rhodes New British Classics - a book that I dip in and out of as an interesting source of ideas. He, more than any of the current crop of famous chefs except perhaps Hugh Fearnley Whittingstall, champions British food in all its variety. He knows its history and wants the world to know how good it can be.

The use of suet is seemingly old fashioned but is really a simple way to add a silky richness - a very good trick to know. Suet is the hard fat from around the kidneys of cattle and sheep. Despite its origin it has no meaty taste at all and is traditionally used in Christmas puddings and mincemeat as well as in pastry and savoury dishes. Supermarkets sell a shredded version. When I asked John at the Ginger Pig if he had any he went into the fridge and took some from around the kidneys from a beef carcass hanging there. It doesn't get fresher than that!

Pork Rissoles with Apple and Prune
Butter
1 large onion, finely chopped
Pinch each of freshly ground nutmeg and ground cinnamon
6 stoned prunes, chopped
1 tspn freshly chopped sage
2 small or 1 large bramley apple, peeled cored and chopped into small dice
100g/4oz suet
1 egg, beaten
450g/1lb minced pork
150ml/ 1/4 pint white wine
300ml/ 1/2 pint chicken stock
Arrowroot or cornflour if necessary for a thick sauce
Salt and pepper

Pre heat oven to 180C/350F/Gas 4.

Melt a knob of butter in a frying pan. Add the chopped onion and fry for a few minutes, without colour. Season with the nutmeg and cinnamon and add the prunes. Cook for 1 more minute and rmove from the heat. Add the chopped sage and leave to cool. Add the diced apples, chopped suet, egg and minced pork. Mix well, seasoning with salt and pepper.

The mixture must be well mixed to distribute all the flavours. Divide into 8 meatballs and shallow fry them in another knob of butter to seal and make them golden brown all over. Put them into a roasting tray in a single layer.

Pour the white wine into a saucepan and boil until reduced by three-quarters. Add the chicken stock. Pour this mixture over the meatballs and cook in the oven for 45 minutes until tender.

Lift the balls from the tray and keep warm. Strain off the liquor into a small pan and skim the fat. Then either leave it as a light juice or thicken it by mixing 1 tablespoon of cornflour with cold water and whisking it through the juice over a medium heat.

Serve the rissoles with the gravy and a big pile of mashed potatoes and steamed cabbage.

Quintessentially English I think.

Sunday, November 26, 2006

Cauliflower & Stilton Soup


Though most strongly associated with Christmas - because it is so special perhaps? - Stilton is one of my favourite cheeses all year round. In 1996 it was granted Protection Designation Origin status by the European Commission and there are only 6 dairies anywhere licensed to make Stilton - only using pasteurised milk from local cows in the counties of Derbyshire, Leicestershire and Nottinghamshire.


Its name comes from the town where it was famous as long ago as the early 1700's - Stilton - but because it is located in Cambridgeshire they can't actually make Stilton themselves. Indeed, they never have. Frances Pawlett, the wife of a Melton Mowbray dairy farmer, is the first to be credited with making this fine blue cheese and it was sold to travellers who stopped at the Bell Inn in Stilton on journeying between London and the north. In 1727 Daniel Defoe remarked on passing through Stilton, a town famous for cheese in his Tour Through England and Wales.

As with many of the finer things in life this cheese is made slowly and with great care - to be sold as Stilton it must be cylindrical in shape, form its own crust, be unpressed and have delicate blue veins radiating out from the centre. Most of all it must have that creamy crumbly richness, its mellowness giving way to a piquant aftertaste. It is a delight on any cheeseboard with crisp celery or oatcakes and is the perfect accompaniment to a glass of fine port.

Sometimes - though in my case rarely - there is a little left over that needs to be used up. It was a situation I found myself in this week and rather than waste it I set my heart on making steaming bowls of cauliflower soup, made unctuously rich with my little treasure trove of cheese. And this is how I did it.

Cauliflower & Stilton Soup

1 cauliflower, broken into florets
1 onion, peeled and finely chopped
1 tbspn butter
1 tbspn olive oil
bouquet garni of bay leaf, parsley and thyme
650 ml/ 1 pint stock
325ml/1/2 pint whole milk
1 tbspn cornflour mixed with a little water
150g/4oz stilton, crumbled
salt and ground black pepper

Fry the onion in melted butter and olive oil in a large pan till translucent - about 10 minutes. Add the cauliflower and toss till the little curly heads shine then add the bouquet garni and the stock. Bring to a simmer, reduce the heat to low, cover and cook for about 20 minutes.

Remove the bouquet garni and liquidise till smooth - for ultra silky pass through a fine mesh sieve at this point. Return the pan to the heat, stir through the cornflour paste and then the whole milk. Cook gently for 10 minutes then stir through the cheese, adjust the seasoning and serve with thick slices of rye bread.

Good enough for Santa.

Monday, October 23, 2006

Boiled Ginger Cake


The parents of my sweetheart came down for the weekend for a matinee of Brecht's Galileo at the National Theatre and then dinner at home. I planned to have a fairly simple meal that could mostly be prepared in advance as we didn't get home from the theatre till nearly 6pm. We had smoked salmon on thick warm slices of hoxton rye with a glass of pink champagne then roast spiced lamb and to finish, rather than a pudding, I wanted to have cheese.

To save the platter from being too simple I found a recipe for boiled ginger cake that makes a perfect accompaniment to caerphilly and to softish sheepy cheese. It comes from that doyenne of middle class pleasure Constance Spry who ran a school in the 1920's teaching teenage factory workers one day a week how to cook and other homemaking skills, including flower arranging. This version is an adaptation from Rose Prince's book 'The New English Kitchen'.

It is a very simple cake to make and the treacle makes it rich and sticky like burnt toffee and it offsets the cheese perfectly. It added a really interesting end to the meal.

Boiled Ginger Cake

120g/4oz butter
120g/4oz soft brown sugar
120g/4oz sultanas
2 tbspns water
300g/10oz black treacle
1 1/2 tspn ground ginger
2 eggs
180g/6oz plain flour
1/2 tspn bicarbonate of soda
60g/20z ground almonds

Preheat the oven to 150C/300F/Gas 2. Put the butter, sugar, sultanas, water and black treacle into a saucepan and bring to the boil. Boil for 5 minutes then set aside to cool. Beat in the ginger, then the eggs one at a time. Sift in the flour with the bicarb of soda and ground almonds and fold in well.

Turn the mixture into a greased 20cm/8 inch square cake tin and bake for an hour. Cool on a wire rack. Make it at least one day in advance - it improves the wonderfulness of it.

This fits very firmly into a category that I call savoury sweet things - it has all the usual ingredients for cakey things but produces something that is not exclusively sweet but rather goes very well with the non sweet. A category in which I sometimes find even myself.

Tuesday, August 29, 2006

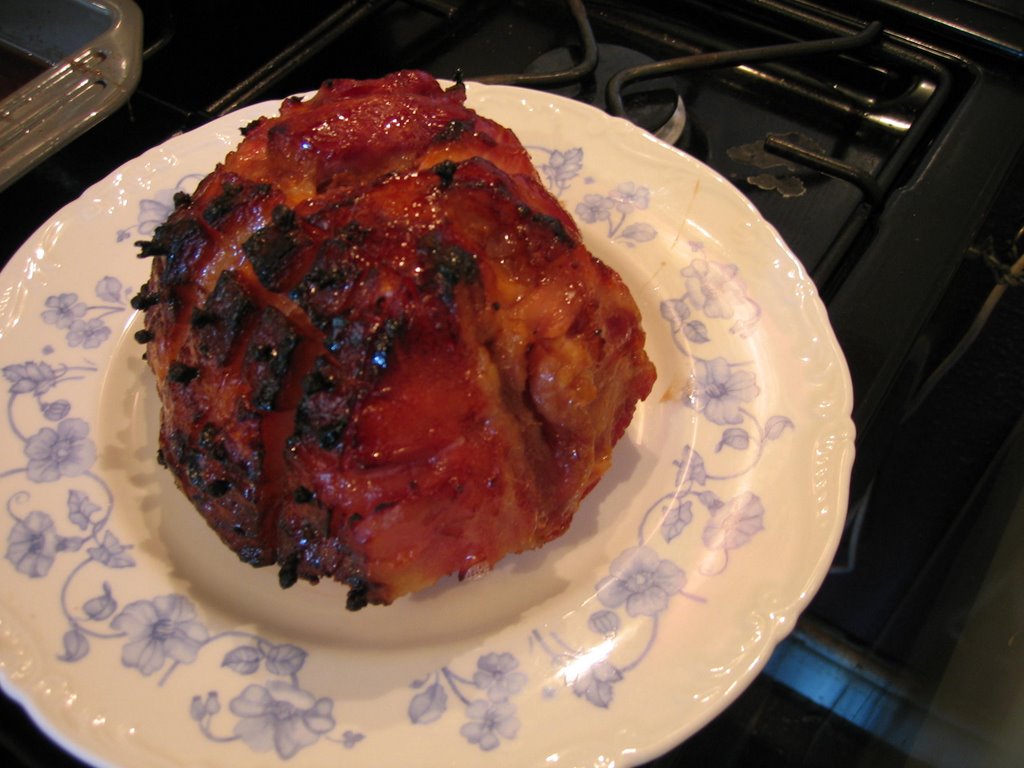
Glazed Gammon


Gammon is pork from the hind leg of the animal cured in brine while it is still attached to the side of the pig. Historically, before the advent of refrigeration, fresh pork was not much eaten for fear that it was bad but it was instead cured to make gammon and ham and bacon and in such form was hugely popular. Gammon is fabulous for many things - as a simple supper with fried eggs and, if the lovely boyfriend has his way, chips. It's great cut into thick slices between thick slices of crusty bread - mustard optional. I really like it with creamy potato salad and it is perfect in lunchboxes with brown rice salad and a few crisp sugarsnaps. It's inexpensive to buy and easy to cook and it gives you so much pleasure. It is a perennial favourite.

When cooking it really needs to be simmered for at least part of the time so that it will be juicy and tender but it takes very well to being glazed and finished off in the oven. To glaze a piece of gammon you need to take the skin off after it has been cooked - it is really easy to do with a sharp knife. Then you cut the fat - and it should have a nice ridge of creamy fat for flavour and succulence - into diamonds by simply slicing at an angle across the top of the meat then slicing at the reverse angle to make crisscrosses. This is really easy and when it is finished it is so impressive - it's a pleasure to see.

Glazed Gammon

1 piece of unsmoked gammon about 1 1/2 kg
1 onion - unpeeled and halved
1 large carrot - roughly chopped
1 stick celery - roughly chopped
Bouquet garni of parsley, thyme and a bayleaf
10 peppercorns
10 cloves

For the glaze
50ml honey
50ml port
2 tbspns brown sugar
30-40 cloves

Put the gammon into a large pan with the aromatics and cover with fresh cold water. Bring to the boil and skim any scum that floats to the surface. Reduce the heat to a gentle simmer and cook for around 90 minutes. Turn off the heat and leave to cool for 15 minutes in the liquid - or completely if you're not ready to glaze it.

Preheat the oven to gas mark 6/200C/400F. Place the meat on a board and when cool enough to handle cut the skin off as thinly as possible with a very sharp knife then cut score the fat at an angle all the way across then again at the opposite angle to make a diamond pattern across the meat. Push a clove into the centre of each diamond. Rub the brown sugar into the fat. Heat the honey and port till it simmers. Put the gammon into a roasting pan and pour the honey/port mix over. Roast in the oven for 20 minutes till deep gold but keep an eye on it - the sweet glaze can catch and burn quite easily.

Remove from the oven, cover with foil and when cool, refrigerate overnight.

Unveil and expect applause for the magnificence of this dish!